- Decals: Xtradecal (?)
- Additionals: Paragon ejection
seats MB Mk 10
- Eduard Accessoiries; Tornado
Exterior Detail Set
- Eduard Accessoiries; Tornado IDS
Cockpit Detail Set
- Tanks (2250 ltr), 2x 1000lbl GBU
and ECM pod from Airfix Tornado GR1/1A kit
Panavia Tornado GR1 is, to my
opinion, one of the most beautiful planes ever build.
Although the performance doesn’t
equal the modern fighter anymore, especially in close combat, there is something
that triggers me in the plane.
Maybe it is the remembrance, I
still have when watching the TV in late 1990 when Desert Shield started.
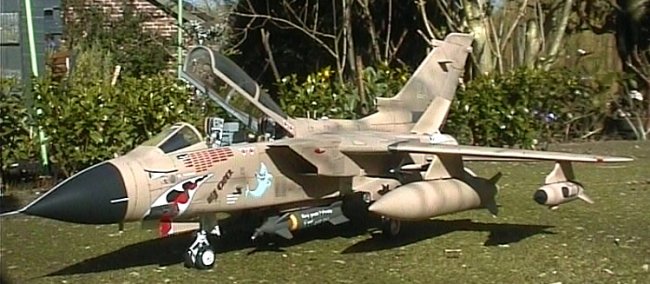
Therefore I decided to build a
Desert Storm Tornado GR1 with a kit from Revell, I still had.
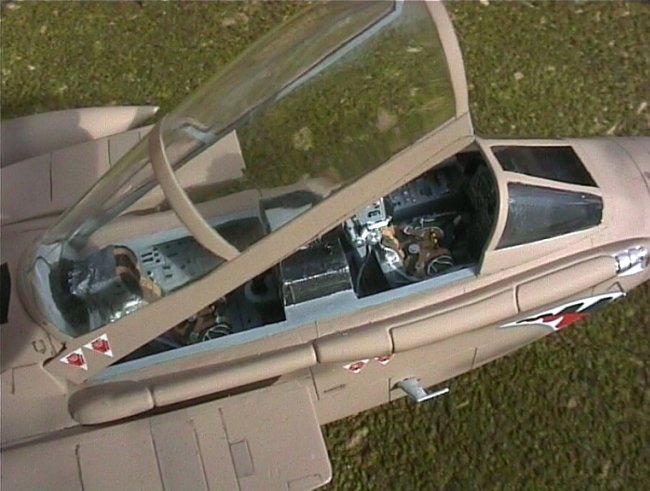
The cockpit had to be rebuild
because the ECR-cockpit is quite different than the GR1.
I decided to use the Eduard
Accessoiries set for it, simply because there was nothing else.
Studying cockpit pictures, I
noticed a discrepancy between the model and these pictures. Revell built
an universal model for both a GR1 and a F3, so the space of the back seat
cockpit is too large. There was room for a second stick (including a
hole). At that moment I decided nothing to do at this discrepancy except
of restyling the instrument panel.
Once the cockpit was completed,
it was glued into position with the fuselage part.
The construction of the fuselage
part, which contained the two sideparts, cost me several years of my live. There
is absolutely no connection pins or whatsoever to glue the parts together.
And there was much differences in
the sizes between the cockpit and the fuselage. They didn’t line up at all.
This meant a lot of sanding.
But the worst part had to come.
The engine nacelles had to
be glued to the main fuselage, but at that point there was a really big gap to
fill, at least this is what I thought. I started grinding till there was hardly
no material left but still the gap existed. During this construction phase, I
lost my temper more than once.
I decided to look for Tornado
pictures once more and there I found the solution. There ought to be a gap
between the top half of the nacelles and the fuselage. It was meant to be
there!!!
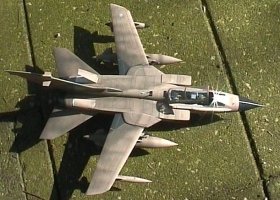
After this heartbreaking
construction, the next disaster had to come, namely the wings.
Revell designed a construction in
which the wings can swing for- and backward. This could be realized by deforming
some plastic parts with a hard piece of metal. Yep, breaking the plastic parts
was the outcome after which I decided to glue the wings in one position. No
swinging for me.
The mainwheels are too light for
this plane, especially when you take into account that there must be 30 gr.
(!!!) of weight added to the nose to keep the plane in balance. Without blushing
Revell writes this into the user description.
The rest of the construction was
uneventful, comparing with the above mentioned.
|
(click on
the image below to load the full size photo)
|
 |
 |
I decided to stick two English
GBU’s with Desert Storm writing under the plane. One description tells “Sadam
go to hell” and the other says “Give peace a chance, if not EAT THIS”.
I brushed the plane in Xtracolor
032 RAF Desert Pink and some panels I brushed another colour. After that I
applied the decals. I brushed the whole plane with a clear, glossy coat.
|
(click on
the image below to load the full size photo)
|
 |
I highlighted the panellines with
a dirty thinner and after doing this I applied a coat.
After that I weathered the
aircraft with my airbrush (a mixture of thinner and paint).
I did some additional work in
constructing some hydraulic tubes at the front and maingear.
John
|