|
History
of the aircraft modeled:
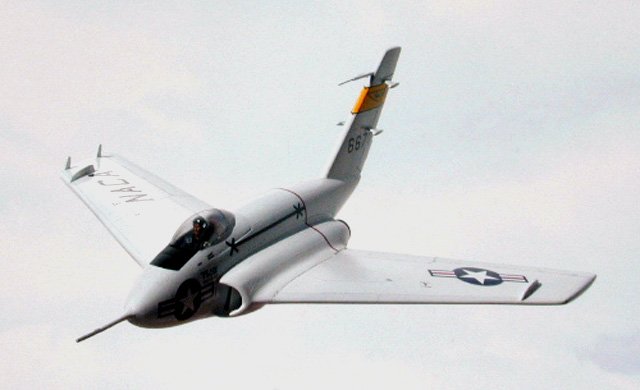
The Northrop X-4, Bantam, was a single-place, swept-wing,
semi-tailless airplane designed and built to investigate that configuration at
transonic speeds (defined as speeds just below and just above the speed of
sound, but in this case, the testing was done primarily at just below the speed
of sound). The hope of some aerodynamicists was that eliminating the horizontal
tail would also do away with stability problems at transonic speeds resulting
from the interaction of supersonic shock waves from the wings and the horizontal
stabilizers.
Northrop
Aircraft, Inc. built two X-4 aircraft, the first of which proved to be
mechanically unsound. However, ship number 2, with a thicker trailing edge on
the wings and elevon, was very reliable. Ship 1 was then grounded and used as
parts for ship 2. While being tested from 1950 to 1953 at the NACA High-Speed
Flight Research Station (predecessor of today’s NASA Dryden Flight Research
Center, Edwards, California), the X-4’s semi-tailless configuration exhibited
inherent longitudinal stability problems (porpoising) as it approached the speed
of sound.
The
X-4 was a small twinjet-engine airplane that had no horizontal tail surfaces,
depending instead on combined elevator and aileron control surfaces (called
elevons) for control in pitch and roll attitudes. Data gathered from the
aircraft’s blunt elevon research were helpful in the design of the Bell X-2,
which had ailerons with blunted trailing edges. The NACA X-4 program also
provided substantial data on the interactions of combined pitching, rolling, and
yawing motions. This interaction was soon to become critical to upcoming
high-performance military fighters. The X-4, ship 2, flew 82 research flights
from 1950 to 1953. With a minimal lift-to-drag ratio of less than 3, the X-4
performance was similar to the soon-to-be-developed X-15. With this similarity
in mind, NACA conducted approach and landing studies of X-15-generation aircraft
using the X-4. The X-4, retired in 1954, ended its days as a pilot trainer.
Building
the model:
Kit used: MPM, kit number 72093
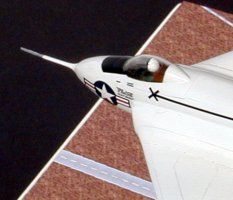
Cockpit:
| Build
using the kit parts except the headrest, which was too wide for the canopy
to close correctly, even my scratch-built replacement tilts too far
forward, but that's the way it had to be for the canopy to close properly.
The pilot is a PJ Production 1.72 scale resin figure. He was primed in
neutral gray and hand painted. Ink and acrylic washes were used. Harnesses
buckles are cut from a True Details 1/72 photoetch seat belts and super
glued to harnesses made from sanded masking tape strips painted olive. |
Click on
image below to
see larger image |
 |
|
The
cockpit was painted Light Ghost Gray and the instrument panel black. Instrument
gauges were done with Reheat Models instrument panel decals applied over white
punched disks of white trim. The
headrest was painted leather. Reheat Models control placard and data placard
decals were used also on the side panels made from cut sheet styrene. A
scratch-built throttle was also added from a cut piece of a punched disk and
some fine wire.
Intakes:
The
basically were none. I took a cheap shot and ran some pseudo intake fans and
sidewall from gloss white photo print sheet. It was easy, but it ain't all that
correct. It still looks better than the kit's see through intakes.
Exhausts:
|
Click on image to
right to see larger image |
I
didn't like the tiny little exhausts, so I made my own from Styrene tube.
I also made a backing from pseudo exhaust prints. The exhausts were
painted back followed by Gunze Burnt Iron. They were installed in the
final assembly. |
|
Exterior:
Okay,
this was the usual sand and fit PMP kit. It is not up to standards of the
industry, but once you get there, you will have an attractive little model. But
far an away, the hardest part of this kit was getting those tine tail balances
glue on and lined up. They were part of the resin parts, which also included the
wing fence and nose pitot. The canopy was masked with Bare-metal foil and the
entire model primed in Polly Scale Reefer White. After a little fix up, I
sprayed two more coats of reefer white and let dry. I used two coat of MM Gloss
Clear Acryl for decal prep.
Decals
from the kit were used and they were excellent. They moved a little better than
former Propagtem decals, but beware, they are exceedingly thin and will fold
under as the slightest breath. I only managed to muck up one of the fuel filler
decals and simply left two off. But the others were very good, not problems at
all.
After
the decals had dried, I gave the model two coats of Future. It got a little
thick on the upper starboard wing and some touch up can be seen, ah shucks. The
model was given two more coats of Future to help hide the touch up a bit, but
you can still see it. I replaced the vertical tail pitot with hypo tubing and
fine wire.
Caz
|
|