|
|||||||||||||||||||||
|
|
|
|||||||||||||||||||||
|
|
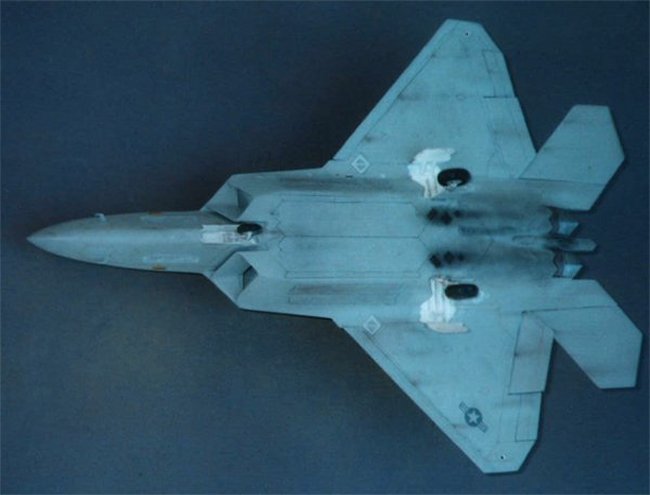
This kit will take a bit of time longer than normal if you choose to close the weapons bays. I chose to do this as the sidewinder missile bays were not accurate according to my reference photos so I chose to leave them out. Since you cannot see the AMRAAM bays as they are on the bottom I chose to close these bays as well. However having now completed the kit I would have opened both bays to give the model a bit of life. As it is it is a wee bit boring I feel. The AMRAAM bays were no problem however the Sidewinder bays required a far bit of putty and the panel lines for the bays needed to be re-etched afterwards. Nevertheless the plastic on this kit is quite soft and so while some sanding is required it doesn't take too long. Just damned annoying. In order to improve the life of it a little bit I dropped the front slats, ailerons, flaps and I moved the rudders slightly but not too much just to give it a look that the hydraulics were not operating while unattended on the ground.
I painted the plane in Tamiya acrilics using a lightish grey spray can and airbrushing XF-66 light grey as the upper camoflauge colour. I used gunze metalisers for the exhaust. Then once decalled (decalled using Mr Softner - I find I don't need to decal with a gloss coat if I use the Mr Softner so for me that's onse step skipped.) I spraying it with Gunze Topcoat (Flat) and waited for a week or so. Once the week had past I ran a wash of raw umber (using Reeves Oil Paints) into the panel lines (doing each individually) and also Ivory Black into the panel lines in the rear section and picked out specific panel lines with the black.
Then after further checking of the reference photos I weathered it using pastel chalks. I made it Raptor 020 so it is not a test model but part of the production batch (totally hypothetical of course as this marking won't eventuate in the real world). I chalked the model as best I could to make it look like my reference shots but I also wanted to add some gun smoke stains to the gun exhaust and also to the APU door. Normally at this point I would run a final wash over it using my airbrush mixed with some very light grey, flat clear (gunze) and heaps of thinner. This adds a realistic tone down for all the colour and a nice weathering effect. However on this day it was 40 degrees and so the paint was drying before it would hit the model so it is photographed without this. (Airbrushing outside in the Australian heat has it drawbacks!) The canopy was tinted using the excellent instructions from the "tools & tips" section on this site. My photography is grainy but I hope you enjoy. My next step is to learn how to do better model photography! David Porter
|
|
Photos and text © by David Porter